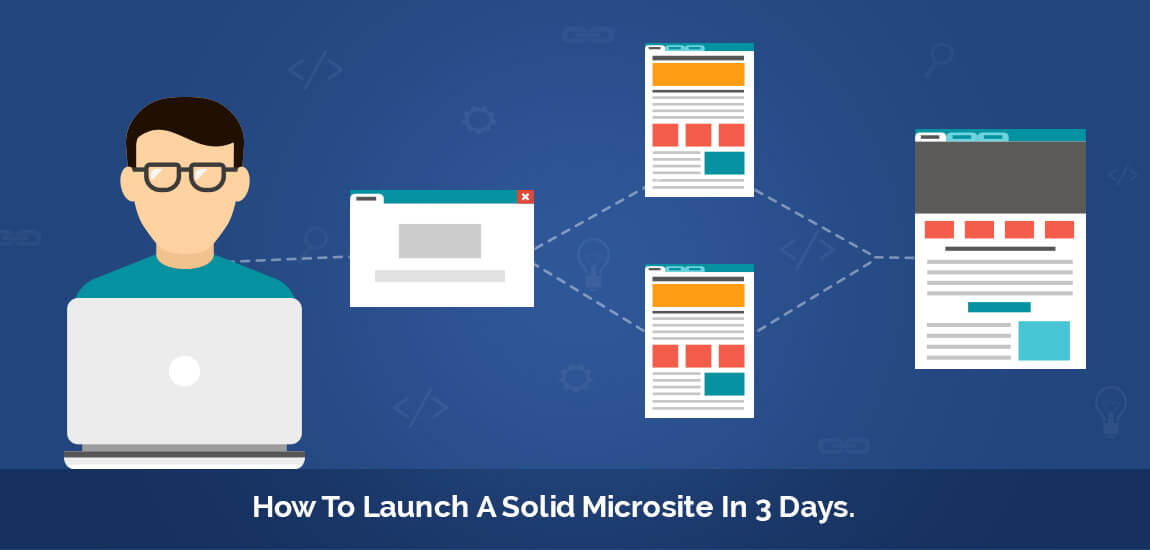
Microsites allow you to break away from the feature creep of your primary site and create a space with a singular marketing goal. By stripping away the necessity for typical branding, navigation, and cross-promotion, a microsite provides you with remarkable clarity.
In this guide, we explain how to build a microsite with concrete marketing goals in mind. We have broken the guide up into 3 days, not all of which need to be executed consecutively, and some of which could certainly be extended into longer periods of time if you desire a more elaborate microsite.
What follows absolutely can be executed in 3 days, however, and serves as a comprehensive guide for developing a strategically solid microsite.
Day 1
1. Set Your Strategic Goals
First and foremost, it’s important to determine whether a microsite is the right solution for the task at hand.
Microsites are useful because they strip away the navigation and formatting of the parent site, allowing for a more focused experience. With bulky headers, footers, and competing calls for action removed, all attention can be placed on a single, concrete goal. Without the restrictions of the parent site’s themes, you are free to approach design in whatever way best fits the goals of the microsite.
But this comes with a cost. The microsite may not have as memorable a domain name as your brand. Since it uses an entirely different technical stack, it needs to be either maintained separately or abandoned as technology and design trends move on. And abandoning design ties to the parent site entirely can damage branding potential.
Microsites are best suited for focused campaigns like events, special web apps and interactive media used to draw attention, lead generation magnets, certain promotions, and products that warrant having a unique brand to themselves.
Since the benefit of a microsite is the focus, it’s best to set one concrete, primary goal that drives the entire project forward. Examples include:
- Capture lead contact information
- Maximize event attendance
- Establish branding for a specific product
- Encourage user-generated content about your brand
- Spread awareness about a problem your product is meant to solve to a more general audience
Using this primary goal as the driving force behind the rest of your decisions, you will next need to make some decisions about:
- The intended “shelf-life” of the microsite. How long will it exist, and will it need to be maintained and updated, or can it be designed with the knowledge that it will be sunsetted in the near future.
- Which platforms will be used to drive traffic? Will the site exist long enough for SEO to do its work, or should the focus be on generating short-term buzz, or is paid advertising the only feasible platform for your goals?
- What will you want the visual design of the site to communicate? What general style, look, and feel is most appropriate for your target audience, and how should this influence the content itself?
Keep these decisions in mind as you work your way through the remainder of the process.
2. Perform Keyword Research
Even if you don’t plan on search engines as an important channel for your microsite, it’s important to come to a decision about what language to use in reference to your microsite. Your target audience needs to know that your microsite is relevant to them, and keyword research is an important part of making that determination.
Your primary goal should drive the keywords you consider. Some examples:
- If your goal is to generate leads, you should be thinking about lead magnets and the keywords related to them, such as the white paper, webinar, spreadsheet, template, guide, tool, calculator, and so on.
- If you are marketing an event, consider what keywords are used in the area surrounding the event, and not just the city, but another relevant local language.
- If you are establishing branding for a specific product, determine what subcultures you are targeting, visit their communities, and identify language and interests that are unique to those subcultures.
- If you want to spread awareness about a problem your products can solve, consider informational queries and look for question words like who, what, when, where, why, and how.
Before simply diving into the Google AdWords Keyword Planner, we recommend taking some steps to make sure you are starting your keyword research from a more unique and targeted starting point.
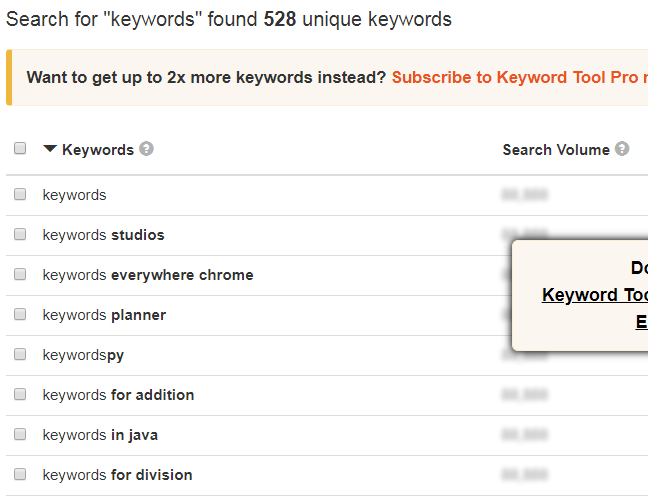
Identify a list of sites where you are likely to find members of your target audience, then perform a site-specific Google search for some of your top-level keywords, like this:

Visit these pages and look at the language that is being used, especially in comment sections or discussions being used by your audience, and particularly the way relevant questions are phrased.
Make a list of audience-specific jargon or slang and common relevant questions and topics of discussion.
Next, take these keywords to keywordtool.io, a site that generates long lists of keywords based on the autocomplete and keyword suggestions provided by Google, as well as YouTube, Bing, Amazon, eBay, AppStore, and Instagram for even more ideas.
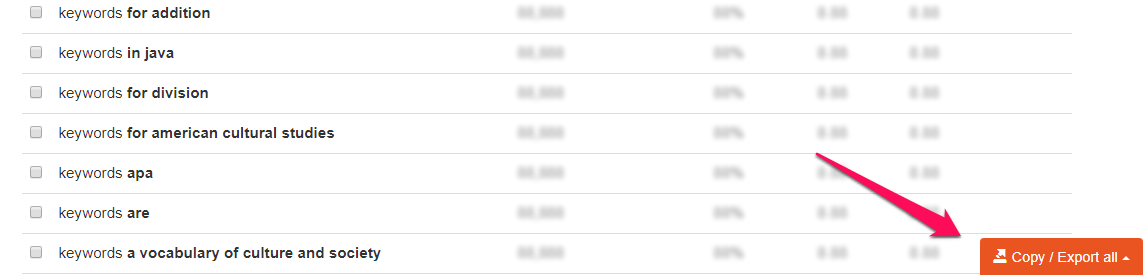
Use the “Copy / Export all” button in the bottom right to get the full list of keywords.
Now, open up the Google Keyword Planner and select the “Get search volume and forecasts” option:
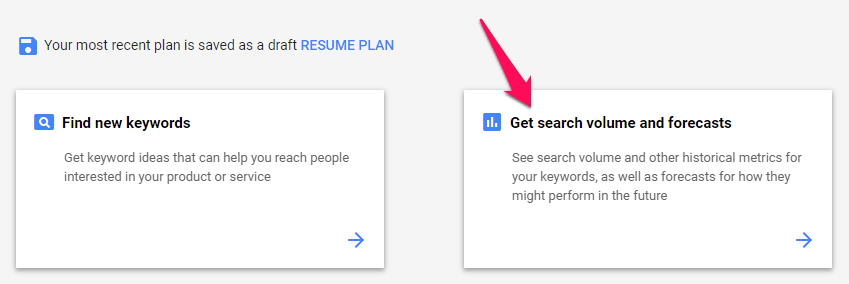
Paste your keyword list here and click the “Get Started” button:

Now click over to the “Historical Metrics” tab and sort by “Avg. monthly searches” to see which keywords have the most traction.

Obviously, you will need to weight popularity against relevance, but this method will give you a lot more options to work with than you would generally find if you simply took your top level keywords straight to the Keyword Planner.
From your list, select a primary keyword or key phrase that is a good match for the primary goal of your microsite. You should also select several smaller keywords you plan to address, including common questions, concerns, and objections your target audience seems to have based on your keyword list as well as the research you did when you were visiting their popular sites.
3. Choose A Domain Name
When deciding what to name your microsite, there are several considerations you will need to take into account:
- How often will users visit the site? If they will only visit it once, a memorable name may be less important than an informative one.
- How will users find the site? Keywords will be a stronger consideration if you plan on capturing search traffic, although they should never drive the name entirely.
- How big a factor is social media? A “clickbaity” and shareable name will be more important social media factors into your strategy. Of course, I’m not actually suggesting you use clickbait, your site’s name should deliver on its promise.
You can use this business name generator with Shopify to generate names based on a keyword and check if the domain names are available:
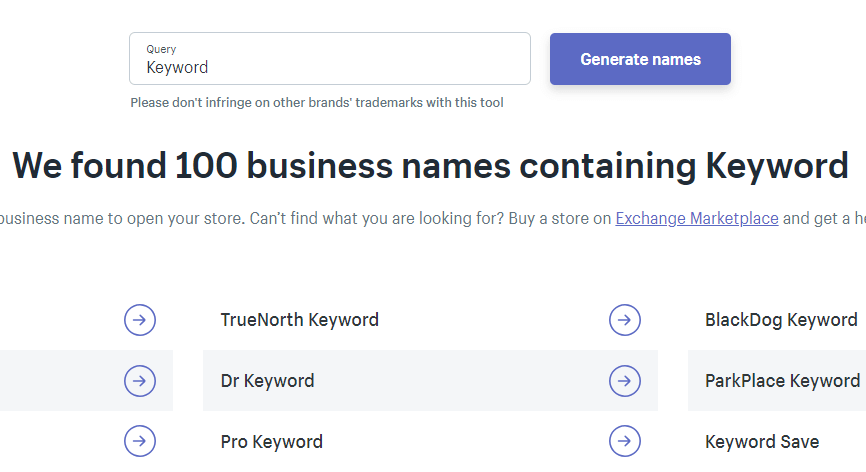
Whether you use the exact names recommended by the tool or not, seeing an expansive list of ideas can help get the creative juices flowing.
Whatever method you use, don’t get too excited about a domain name until you’ve verified that it is available and purchased it so that nobody else can buy it up before you move on with your process.
Day 2
4. Set Up Your Domain And Hosting
Now it’s time to start setting up your microsite.
Domain
First, you’ll need to register your site’s domain name.
Three commonly suggested domain registrars, which are also web hosts, are:
There is very little difference between domain registrars, but there are still some things you will need to look out for:
- You should be able to transfer your domain name to a different registrar, preferably with no fees. It’s common for registrars to prevent you from doing this for the first 60 days, but any other restrictions are generally unwarranted.
- Check out customer support reviews to make sure that they’ll be able to help you with any technical issues you might run into.
- Domain name loss. A good registrar will hold onto your domain for a set period of time before selling it to somebody else if you fail to renew your contract due to an expired credit card or a similar issue. They should also send you reminders to renew.
- User interface. You won’t interact with your domain registrar very often, but you will need to get your nameservers and manage some account features in order to get your site up and running, and an intuitive user interface is important for this.
Hosting
After registering your domain, you will need to set up hosting for your microsite. We recommend using the same hosting provider as you are using for your primary site, at least if you or the developers who will be working on it are more familiar with that platform.
Setting up a microsite quickly will require an intuitive and flexible CMS. If you are already familiar with and using an e-commerce hosting platform, such as Shopify, you may wish to set up the microsite using the same platform to help the process run smoothly. Alternatively, you may want to use a platform like Squarespace to set up a site with a user-friendly interface.
For the purposes of this guide, we will assume that your CMS will be WordPress since it is a free and open-source platform with broad functionality and is also very user-friendly.
If you purchased your domain name through Bluehost, NameCheap, or Hostgator, you will be able to set up hosting through the same provider.
If you purchased your domain from a registrar only, you will need to select a hosting provider to transfer your domain name to. We recommend using a shared hosting plan that comes with cPanel since this simplifies the setup process.
Nameservers
After setting up a hosting plan, if you purchased your domain from a separate registrar, you will need to get your nameservers from your host and configure them with your registrar. Nameservers are essentially an address that your registrar will use to point traffic to your web host.
Your host should provide you with your nameservers after setting up hosting. Check with your registrar to find out where to configure nameservers, copy them from your host, and paste them to your registrar.
You may need to wait a few hours for the registrar to update your nameservers so that you can access your domain.
Installing WordPress
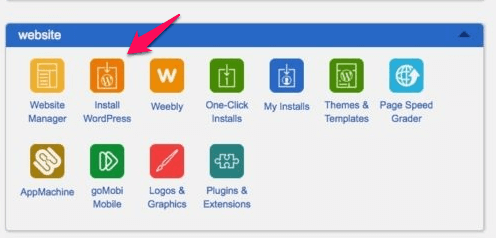
Most shared web hosts have an installer that makes the process of installing WordPress simple.
For example, from the BlueHost cPanel, you can select install WordPress from the “website” section.
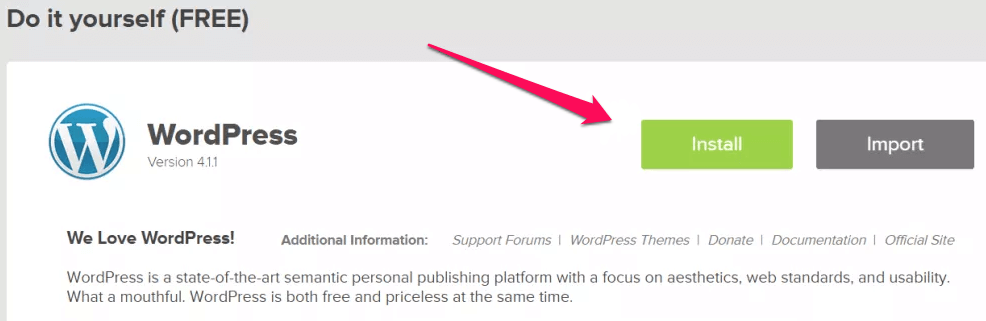
From here, all you need to do is click install:
Then select your domain from the drop-down menu, and click the “Check Domain” button:
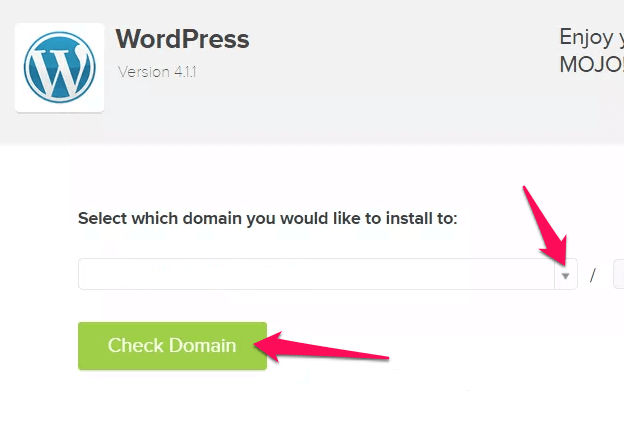
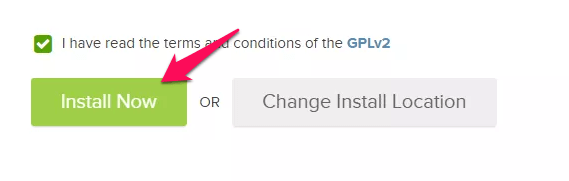
It will run a check on the domain to make sure things are set up properly, then you will click the “Install Now” button:
After a few minutes, the installation will be completed, and you will be able to login to WordPress using the link, password, and username provided, which you will be able to change later.
Different hosts will have different methods, but the installation process is comparably easy. If an “Install WordPress” option isn’t available in cPanel, look for one of these installers:
- QuickInstall: See this guide
- Fantastico: See this guide
- Softaculous: See this guide
These options are all similarly straightforward.
Updating Your WordPress Password
Before diving into developing the microsite, you will want to personalize it with your own password.
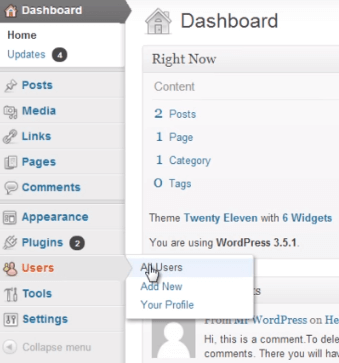
Start by logging into WordPress with the username and password that you were provided, then select “Users” from the left navigation, and click “All Users.”
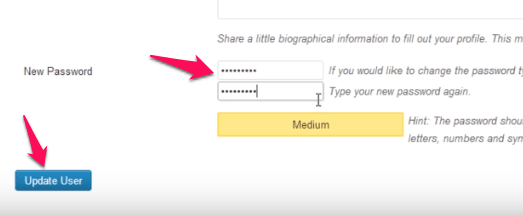
Click “Edit” beneath the username you want to change the password for (likely “admin”), scroll to the bottom of the page, and enter your new password twice. WordPress will indicate whether your password is weak, medium, or strong based on its length. Click “Update User” and you will now be able to log in with the new password.
5. Find A Theme
Now it is time to start thinking about the visual appearance and interface of your microsite.
Here are some things we recommend looking for in your WordPress theme:
- It should have a responsive design so that it works properly on all devices
- It should be low on clutter
- Personalization should be easy
- It shouldn’t be developed under the assumption that a blog is a front and center
- It should be image intensive
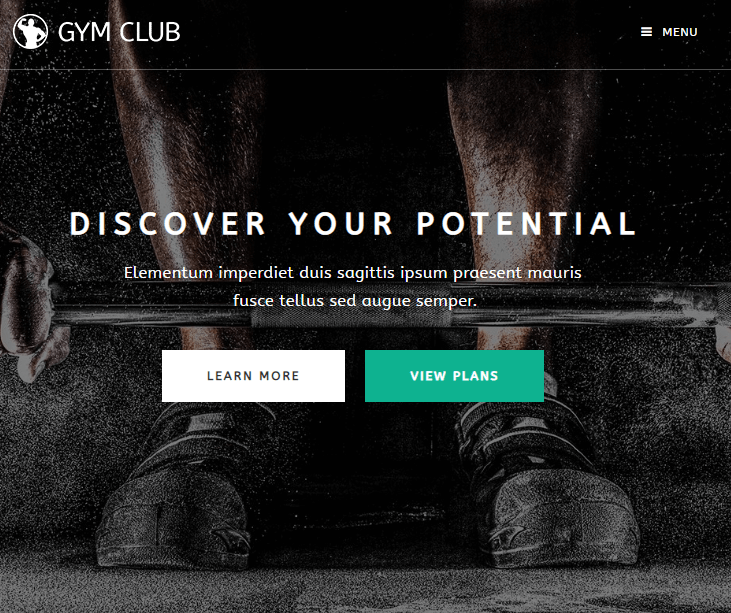
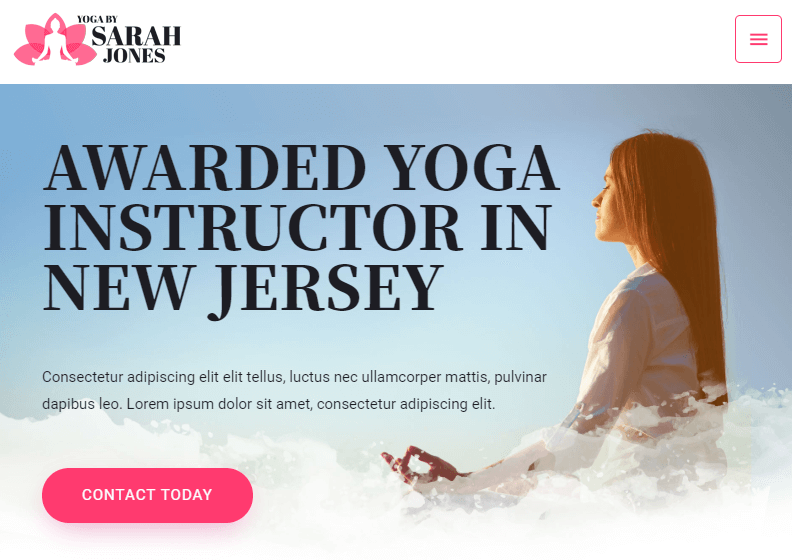
We recommend a theme that allows you to import demos or pre-built websites to get the kind of look you are going for so that only minor modifications need to be made. Examples include OceanWP:
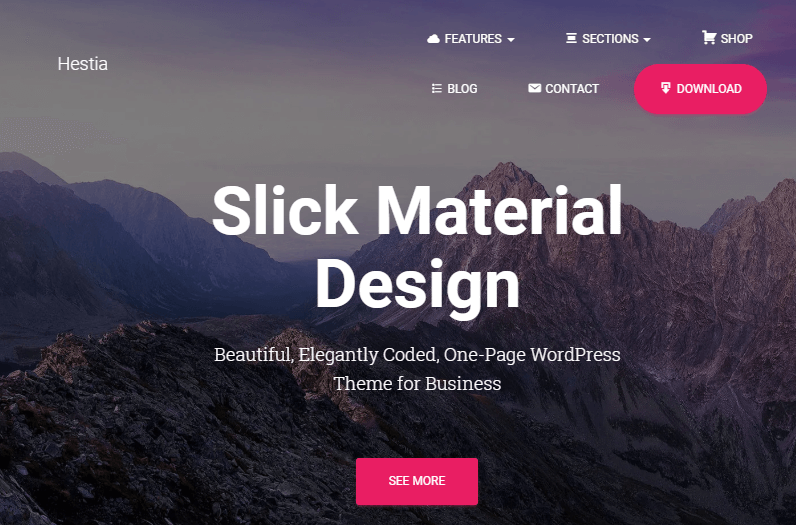
And Hestia:
Being able to remove navigation, create full-width pages, and to visually customize the page without code is important.
Remember, the point of a microsite is to strip away all distractions and put all of the focus on a single goal. The theme you choose should be conducive to that.
Day 3
6. Overcome Objections
In order for your microsite to achieve its primary goal of convincing a user to take an action of some kind, you will first need to identify any objections that they might have to take that action and make sure that your microsite effectively addresses them.
Short of interviewing or running a survey on your target audience, one of the best ways to identify objections is to look at how your target audience is responding to other similar sites with similar calls to action.
Look for discussions and reviews about similar sites and try to identify:
- Reasons users were unsatisfied if they did take action
- Common patterns in similar sites
- Common disappointments users had
- Common reasons users failed to understand the benefit of taking the action
You should also have a plan for addressing common types of objections that show up in virtually any marketing or sales scenario, such as the following.
Price
Even if the action you are trying to get the user to take has no financial cost, the user will always see a cost associated with it. Providing contact information could result in them getting spammed. Generating user content takes away time that could be spent on other things that they may consider more productive or entertaining.
The best way to successfully address this type of objection is to compare the cost of taking the action to the cost of not taking the action, and persuade them that the cost is higher if they don’t take action.
For example, if your goal is to convince the user to download a guide, their first instinct is to think that they don’t need to provide their contact information, because all of the same information can likely be found on the open web somewhere, without them needing to supply contact information.
Your goal in that circumstance should be to convince them that the time saved downloading a comprehensive guide far outweighs the time and effort needed to gather and collect all of that information from disparate sources on the web.
Uncertainty
A common objection users have is that it’s not clear to them exactly how answering the call to action is going to help them achieve the results you are promising.
All too often, marketers place too much emphasis on the benefits of a product or the things that will improve if the user takes an action, but they fail to connect the dots for the user to make it clear exactly why that is going to happen.
The cure for uncertainty is specificity, especially in the form of concrete demos and examples where possible. Crucially, the examples shouldn’t just demonstrate the results, but the process that led to the results. People don’t like working with things they don’t understand, because no matter how many times they see somebody else gets certain results, they can’t be sure it will work the same way for them without understanding how it works.
Too Busy
One of the most common objections people have to any kind of change in their daily life is that they are too busy. This is almost never actually the case, but what it means is that there are other things they still believe are a more valuable use of their time.
Your goal in response to this objection is always to convince them that taking the desired action is a more valuable way for them to spend their time. In part, this is resolved by addressing the issues already discussed in the “Price” section above.
In addition to this, however, it’s important to minimize the amount of time involved by streamlining things as much as possible and demonstrating to them effectively how streamlined the process is.
Previous Disappointments
This is where a thorough review of the competition is immensely valuable. Users who have been disappointed by taking a similar action before will be more likely to have their guard up, but if you can echo that disappointment back to them, this actually becomes an advantage.
By demonstrating that you understand their frustrations with similar experiences in the past, they have more reason to believe that you understand how to provide them with the results they are actually searching for, that the experience won’t be redundant for them, and that the solution you are offering is unique enough to meet their needs.
Determining How To Address Objections
Now that you’ve determined what your target audience’s objections are and roughly what you need to convince them of in order to move forward, it’s time to determine the best way to address those objections.
You can start by writing out the answers that will help users overcome their objections, but the solution in every case certainly doesn’t need to be text. In many cases, it may be an image or visual metaphor, a demo, a video, or the opportunity to speak with somebody in a live chat or over the phone.
Take care to overcome each objection in the most appropriate way via the most appropriate media.
7. Prioritize Information
Now that you know essentially what you need the microsite to say and how to say it, it’s time to prioritize what needs to be said where.
Front and center, within the first few seconds, it’s important to communicate:
- How the user will benefit if they take the desired action
- Some way in which the opportunity is unique compared to competitors
- Some degree of understanding regarding why taking the desired action will lead to the desired result
In other words, you should be including the most important points from your price, disappointment, and uncertainty objections and communicating them very quickly.
How you choose to prioritize information from that point forward depends on how heavily you believe the objections weigh on the user. Use the remainder of the page to go into depth addressing each objection, supporting the claims made at the top of the page.
If the amount of content necessary to fully overcome every objection results in an intimidating wall of text, depending on your target audience, you can include links to additional details regarding each objection on secondary pages.
Unlike a traditional site, however, a microsite’s navigation should always be nudging the user in the same direction. Clicking to learn more shouldn’t be an action that sidetracks the user’s journey and sends them on a wild goose chase. Picking back up where they left off should be simple and intuitive.
8. Content Development
Using your prioritization in the previous section as a guide, draft an outline for your microsite’s content.
Flesh out each point in the outline, referring to the keyword, competitive, and audience research you’ve conducted so far as you go. Work with a designer to address any objections that are best handled visually, and write up notes for any images or videos that should be included within the content.
Start with the assumption that the user will consume all of this content, and that they will do so from start to finish. As we mentioned above, a microsite’s navigation should always be nudging the user forward, from beginning to end, rather than sending them on an indirect path.
Once the content is developed, you can make a judgement call about whether to cut some of the content and place it onto other pages with “learn more” links, preferably with a jump link at the end of the “learn more” page that takes them right back to the same spot on the homepage (not the beginning of the homepage).
9. Implementation
Once the content is prepared, all that’s left is to incorporate it into your theme.
If you chose an intuitive and easily personalizable theme, this part of the process should be relatively straightforward.
Keep the following visual recommendations in mind:
- Use large hero images or sections with alternating background colors to keep things visually interesting
- Use images or icons to visually convey the points you are trying to make in each section
- Allow for plenty of white space. Paragraphs should rarely extend for more than three lines, and shouldn’t take up a full page on a mobile device.
- Use plenty of bullet points and subheadings to make the content easy to skim
- Use varying sizes of text to convey the priority and level of detail of a text
Before distributing your microsite through your promotional channels, be sure to verify that it is indexable by search engines, accessible from all devices and that none of your employees are having trouble using or understanding the site.
Conclusion
By the end of day 3, you should have a fully functional microsite, ready to do its job. Now it’s time to launch and promote. For some advice on how best to promote your microsite, take a look at The Step by Step Guide To Building An E-Commerce Marketing Strategy and some of our other guides.