PHP takes care of running internal functions and process database information for WordPress sites. Unfortunately, after December 2018, PHP will no longer offer critical security support and updates for some of the older versions of PHP. As a result, upgrading to PHP 7.2 becomes crucial.

The picture, however, isn’t all roses. According to W3Tech, 78.9% of all the websites they have surveyed use PHP with only 19.1% using PHP 7.0 or higher version. Out of those using PHP 7.0 or higher versions, only 23.9% use PHP 7.2 while a just 0.1% use PHP 7.3 version.

If you belong to the 75% of the people using PHP 7.1 or 7.0, you can start upgrading your website to the latest version of PHP.
Why PHP 7.2
The PHP community released the PHP 7.2 on November 30, 2017. It comes with new features, functions, and improvements that will allow us to write better code. The PHP development community has made the efforts to make migration as easy as possible. This upgrade primarily focuses on removing functionality deprecated in previous versions and improving language consistency.
PHP 7 and higher versions have replaced many deprecated functions with new and advanced features such as anonymous classes, throwable errors, and type declarations among others. These seemingly minor updates have helped to make PHP a competitive and evolving programming language.
As the minimum PHP requirements for WordPress core increase, many plugins and themes compatible with older versions of PHP will be rendered useless. But most importantly, as these old versions will not continue to receive security patches, your website will be exposed to security breaches.
PHP Version Is Especially Critical for WordPress: Being open source programming language, PHP is a live project. As a result, the PHP developer community is updating and patching it for bug and security vulnerabilities continually. All these changes are responsible for optimizing the processing and delivery of your website content.
In other words, the PHP version your website runs on directly affects the security, speed, and performance of your site. Since mid-2017, wordpress has officially asked their customers to use PHP 7.2 or higher.

Still, according to WordPress, less than 30% of WordPress users have upgraded to PHP 7.0 version or higher with only 9% of WordPress using PHP 7.2, 10.4% using 7.1, and 19.8% using 7.0. But the riskiest fact is that nearly 60% of the users are still using unsupported PHP versions.

So, making the switch to PHP 7.2 is essential. However, that doesn’t mean the upgrading process is going to be a cakewalk. You will still need to consider a few incompatibilities, new features as well as testing the code before switching to PHP 7.2 version.
But, before diving into that, let’s see the benefits of PHP 7.2 first.
Benefits of PHP 7.2
Overall, efforts have been taken to make PHP 7.2 significantly faster, secure, and resource efficient compared to the previous versions. Let’s see what those benefits mean for WordPress users.
1. PHP 7.2 is Much Faster and More Secure
According to Kinsta, WordPress 4.9.4 website with PHP 5.6 can handle 49.18 req/sec while a WordPress 4.9.4 site with PHP 7.2 can wield a staggering number of 148.80 req/sec. In short, PHP 7 can handle three times as many visitors as PHP 5 can, using the same amount of memory.

2. Better Security with New Improved Security Features
Older versions of PHP, especially PHP 5.6 and its predecessors have hundred of security vulnerabilities. With no active support for PHP 5.3, 5.3 or 5.4, hackers will be putting you and your customers in jeopardy. Similarly, the active support for PHP 5.6 is already gone, while the security support is ending by 31 Dec 2018.
On the other hand, PHP 7.2 or higher versions come with new security features such as Argon 2, an award-winning hashing algorithm which is a secure alternative to the Bcrypt algorithm on the previous version of PHP. Naturally, PHP 7.2 is more secure.
3. Better Processing Efficiency
PHP 7.2 requires much less memory compared to the older versions. That means there is a significant improvement in processing the code on the server side. So, the chances of crossing the limit of memory on your server are negligible.
4. Stricter Development Standards
PHP 7 and above, require a higher standard of coding compared to the older versions. In the past, owing to the lack of standardization, custom code with security issues could slow down your website. WordPress also requires you to use only compatible plugins and themes in PHP 7.2 or higher versions. As developers have to abide by stricter coding practices, you don’t have to worry about low performance.
How to Upgrade your WordPress Website to PHP 7.2
The upgradation process may differ slightly depending on your web hosting provider. For example, WP Engine has created easy-to-execute steps for managing different staging versions and back-ups as well as testing the website before the upgradation to PHP 7.2.
Most other web-hosting service providers will require you to use a few extra steps to complete the process and take additional precautions while managing the staging versions and back-ups. Before moving on to the following steps, please make sure your hosting company/server supports the latest PHP version 7.2.
1. Backup Your Website
First, make sure to back-up all your latest WordPress files and database before starting the upgradation process.
2. Checking PHP 7.2 Compatibility
When it comes to checking compatibility, you have to analyze your code to check for potential issues regarding deprecated functions or changed features. Naturally, a manual trial-and-error approach in this regard is time-consuming and labor-intensive. The good news is you can readily automate the checking process.
WP Engine has created a PHP Compatibility Checker as a WordPress plugin. You can use this plugin to check the compatibility of any WordPress website on any web host. All you need to do is to download and install it on your WordPress website just like any other plugin.
Follow the simple instructions to run a scan. You can identify the potential PHP 7.2 issues and take the necessary steps to fix them. The plugin is not limited to WP Engine customers. It is freely available to everyone.
3. Fixing the Issues
The report will show various errors or issues that you will need to fix. These issues can be big or small depending on your site architecture. For example, you may have to find a substitute for an incompatible plugin. However, it becomes trickier to find a replacement if you have opted for complex customization in the former plugin.
4. PHP Test Drive
WP Engine users can run a PHP Test Drive from the dashboard in the production version. You can get a preview of your website in PHP 7.2 without affecting the existing version of your site.
5. Staging Versions
WP Engine users can create three staging versions, including Development, Staging, and Production. For other hosting providers, you have to take care of Back-up as well as staging on your own. (The separate development environment will depend on the WP Engine hosting plan.)
6. Plugin Compatibility
Next, you must check before the update if all the plugins currently in use are compatible with PHP 7.2 or not. You will need to find an alternative for those that aren’t compatible. If there is no substitute, you have to wait until an updated version of the plugin is released.
7. Re-Checking
Once you have taken care of all the potential issues, make sure to run the PHP Compatibility Checker once again. It will make sure everything is working seamlessly before upgrading to the latest PHP 7.2 version.
8. Talk to the Hosting Company
Once you have thoroughly checked everything, ask your web hosting provider to change the PHP versions to 7.2 from their end. This is a critical step as not many hosting companies provide the option to change the PHP version from their end.
9. Going Live
If everything is working just fine, you can make your website live. Make sure to test the live version as well to avoid any malfunctions.
How to Find Errors in PHP 7.2 Testing
When you upgrade the PHP version from the old version to the new one, you will face deprecated error (E_DEPRECATED) and fatal error (E_ERROR) which can cause functionality issues and may even bring your website down.
You can find these potential errors using the following methods.
A. In PHP.ini
To show all errors other than E_DEPRECATED in the php.ini file, you can adjust the error_reporting setting as shown below. However, you should do this only for installs of PHP 5.3 and above.
error_reporting = E_ALL & ~E_DEPRECATEDTo suppress notices as well:
error_reporting = E_ALL & ~E_NOTICE & ~E_DEPRECATEDIn code with error_reporting. You can either straight out set the error reporting level like:
error_reporting(E_ALL &~ E_DEPRECATED);

error_reporting(E_ALL &~ E_NOTICE &~ E_DEPRECATED);
Or remove E_DEPRECATED from the current error_reporting level:
error_reporting(error_reporting() & ~E_DEPRECATED);B. In WP-Config.php
Debugging PHP code is part of any project. However, WordPress comes with specific debug systems designed to simplify the process as well as standardize the code across the core plugins and themes.
Let’s discuss a few common examples.
1. WP_DEBUG
WP_DEBUG is a PHP constant or a permanent global variable. You can use it to trigger the “debug” mode throughout WordPress. It is believed to have the default setting to “False.” In the wp-config.php file on development copies of WordPress, however, you will often see it set to “true.”
define( 'WP_DEBUG', true );
define( 'WP_DEBUG', false );
Note:
- As the true and false values in the above example are Boolean (true/false) values, you don’t have to use apostrophes (‘). Usually, using the apostrophes make a constant a string rather than a Boolean. So, when you set a constant as ‘false,’ it will be interpreted as true.
- The WP_DEBUG or other debugging tools are meant for local testing and staging installs. So, you shouldn’t use them to debug live sites.
PHP Errors, Warnings, and Notices
When you enable WP_DEBUG, you will be able to view all PHP errors, notices, and warnings. By default, PHP displays only fatal errors and ends up showing a white screen of death once the error capacity is full. However, this behavior will change after enabling WP_DEBUG. As a result, you will see error messages for things that may not seem broken but lack proper data validation conventions inside PHP. You can quickly fix such errors by identifying the relevant code. Rest assured, the new code will offer better bug-resistance. It will also be easy to maintain.
Deprecated Functions and Arguments
After enabling WP_DEBUG, you will also see notices about deprecated WP functions and arguments that your website is using right now. These functions or function arguments are often the ones slated for removal in the near future but haven’t been deleted yet. You will also see new unctions that will replace the old ones.
2. WP_DEBUG_LOG
You can use WP_DEBUG_LOG in tandem with WP_DEBUG allowing you to save all identified errors to a debug.log file inside the /wp-content/ directory. Thus, you can view all error notice later. It also allows you to inspect off-screen notices such as the errors while processing an AJAX request or a wp-cron run.
Remember, as it allows you to write in the wp-content/debug.log using PHP’s built-in error_log() function, you can find it quite useful for debugging AJAX events.
define( 'WP_DEBUG_LOG', true );Note: WP_DEBUG_LOG works only when WP_DEBUG is set to true. You can also turn off WP_DEBUG_DISPLAY independently.
3. WP_DEBUG_DISPLAY
One more function you can use in conjunction with WP_DEBUG is WP_DEBUG_DISPLAY. It determines whether or not you can see debug messages inside the HTML of web pages. The default is set to ‘true.’ It will display errors and warnings as and when they get identified. When you set it to ‘false,’ it will hide all the error messages. Using WP_DEBUG_DISPLAY together with WP_DEBUG_LOG will allow you to review the errors later.
define( 'WP_DEBUG_DISPLAY', false );For more information, check out this page. It not only describes the various debugging tools in WordPress, but also tells how to be more productive in your coding and how to increase the overall quality and interoperability of your code.
C. In WP Engine
You can access the error logs for your environment through the WP Engine User Portal. Here’s how you can do it.
- Sign in to the User Portal.
- Go to the Overview page of the environment you want to see the error logs for.
- Click the Error Logs link.
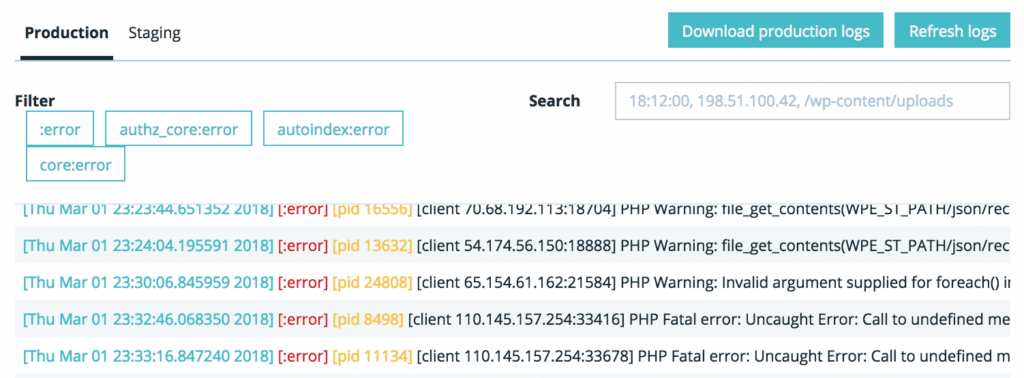
It will now show the Error Logs page for a particular environment. You will be able to see error logs for both your environment and 1-click staging area (labeled Staging or Legacy Staging). You can use the search and filter tool to navigate to a specific error quickly. You can also download or refresh the logs. The refreshment window is 24 hours.
D. In cPanel
First, make sure PHP error logging is enabled. To activate PHP error logging, go to the cPanel, and click the “Select PHP Version” option under the Software menu.
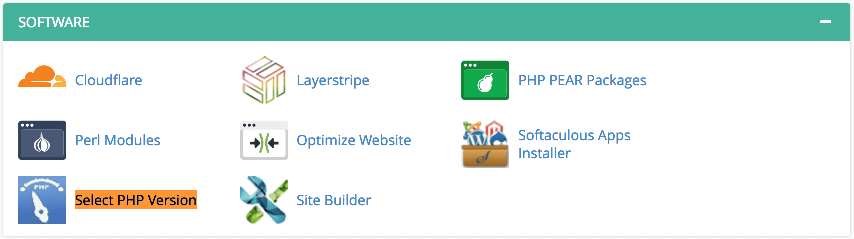
The “Select PHP Version” menu will display following options.
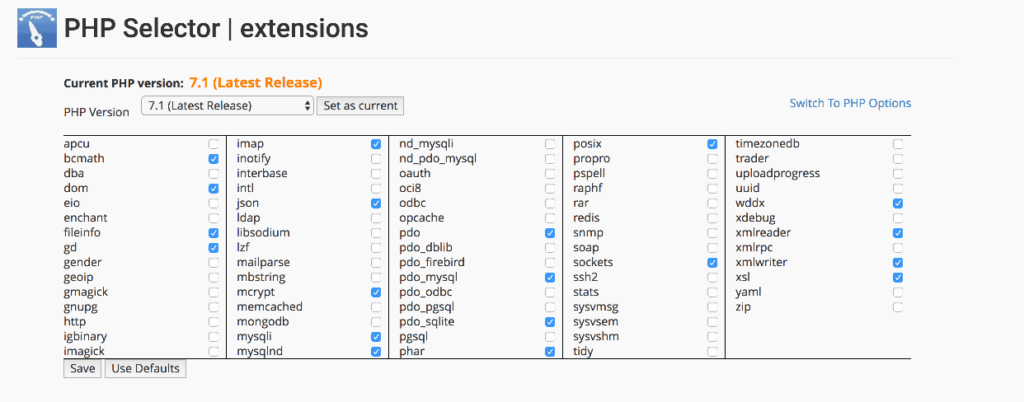
Now, click the “Switch to PHP Options” located on the top right corner of the dashboard.
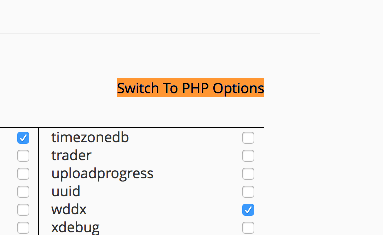
In PHP Options, you will see the following options.
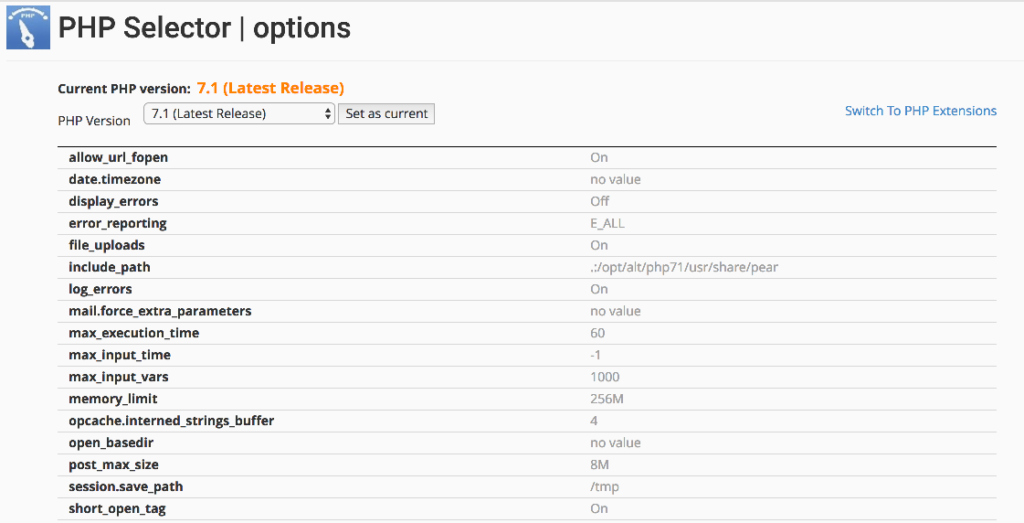
You will need to click E_ALL option to enable it. In this case, however, it is already enabled.

Select the “E_ALL” option to enable error reporting. Now, click the “Apply” button and then select “Save” option located at the bottom of the page.
You will now see all the new PHP errors and warnings recorded in an application file named “error_log.”
Although you can show the PHP errors using .htaccess, it doesn’t work on most hosting servers. Besides, the php.ini method is more convenient and useful. Also, while finding the errors, make sure the plugin or theme is up-to-date. If it is up-to-date, it is less likely to stem an error due to plugin or theme functionality issues.
Parting Words
Although not groundbreaking, PHP 7.2 is still a significant update that comes with more secure and agile features. Encryption as part of the standard library is one such exciting feature in the new PHP versions. With each new version of PHP, developers will get to work with better tools and functionalities. So, if you haven’t done it already, start upgrading your PHP versions now. Feel free to share your doubts or experiences in the comments below.